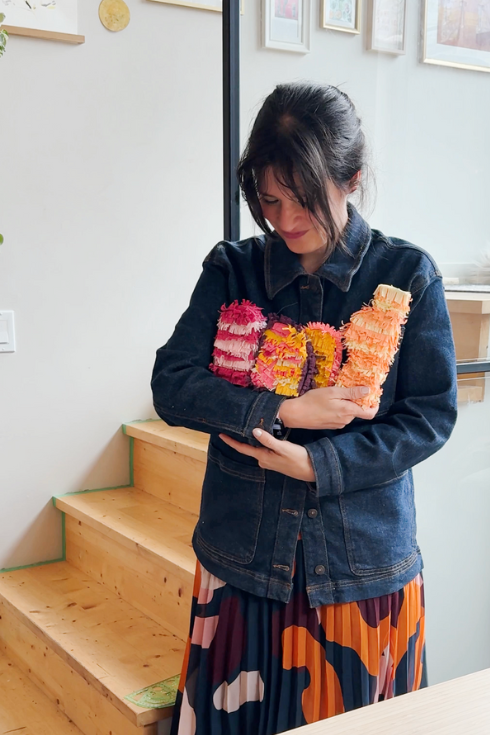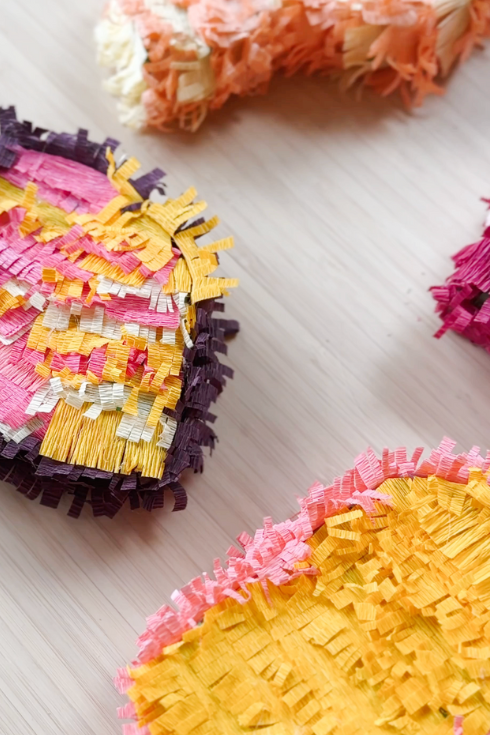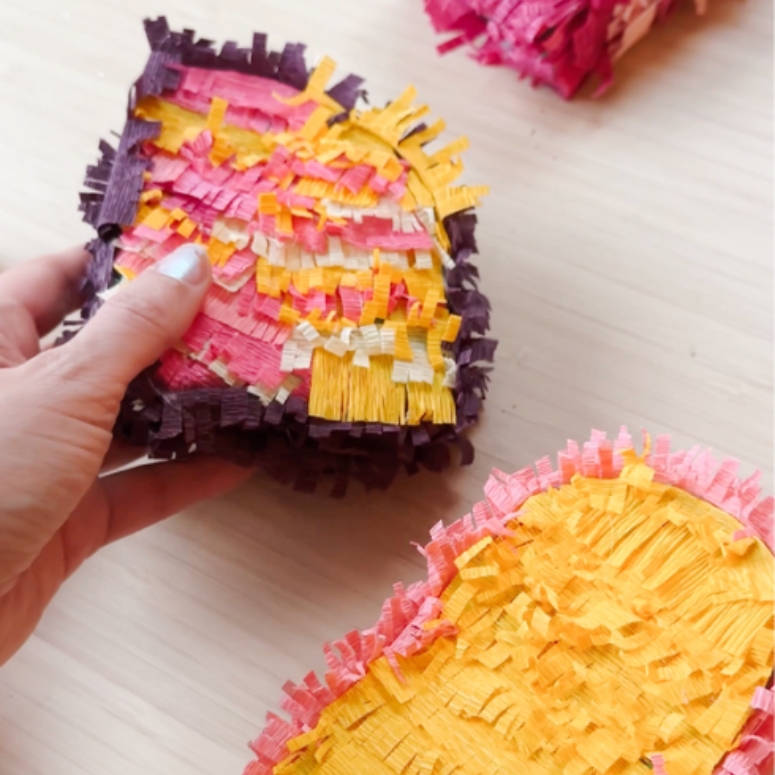
Why settle for store-bought piñatas when you can craft your own delightful DIY piñatas right at home? Not only is this project budget-friendly, but it also gives you a chance to unwind and create a beautiful handmade pieces while reducing plastic wastes.
By making your own mini piñatas, you can customize every detail — from the shape and colours to the unique surprises you tuck inside. It’s your chance to get creative, experiment with eco-friendly materials, and create something truly unique that everyone will love. Trust me, the joy of seeing your handmade piñata in action is worth every minute of crafting!
Sound like fun? Grab your supplies, and let’s bring a little magic to life together.
Materials Required:
- Scrap cardboard (i.e. delivery boxes)
- Crepe paper in different colours
- Hot glue gun and adhesive sticks
- Painters Tape
- Scissors
- Pencil
Related:
Bridal Shower Decoration Ideas on a Budget
Step 1: Basics and Shapes
Let’s start by choosing the preferred shape for this.
piñata
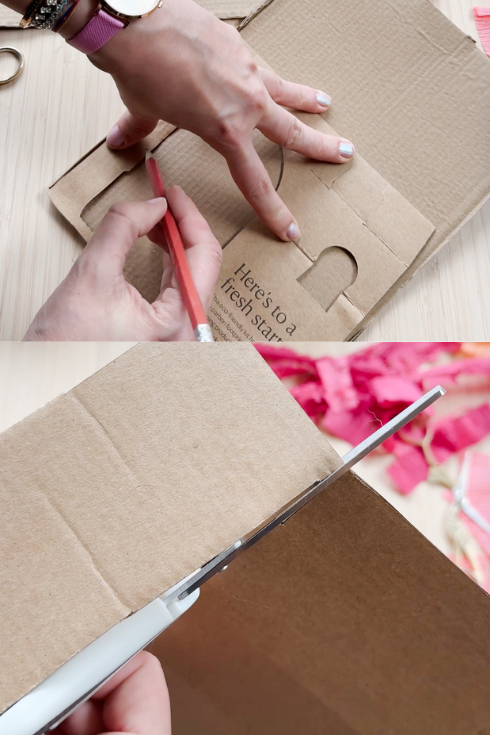
Do-It-Yourself projects. Traditional choices include stars, hearts, or simple rectangles. For this session, let’s explore three distinct designs focusing on both color and form combinations. Draw your chosen design onto spare cardboard; keep in mind, though, you will require two matching parts—one each for the front and rear sections.
Next, carefully cut out both shapes without worrying about achieving perfection. Remember, small imperfections will add character to your work, okay?
Step 2: An Exciting 3D Journey
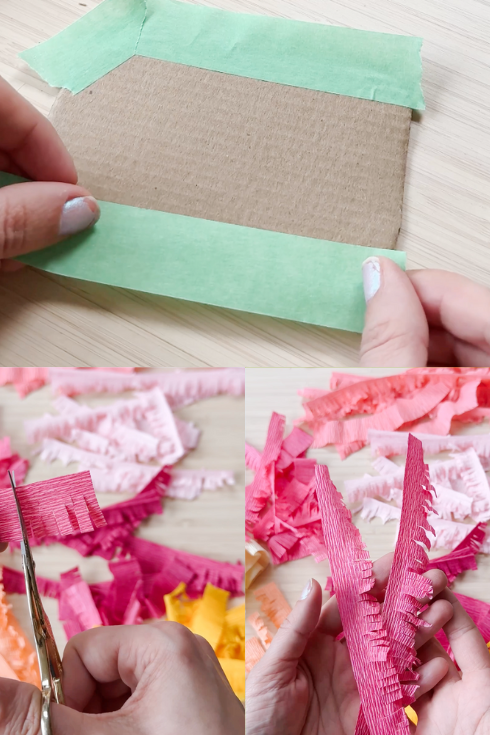
Next, we’re adding the three-dimensional aspect to our homemade miniature pinata by cutting narrow pieces of cardboard, approximately 1-2 inches wide; these will eventually become the walls or sides of the finished item. You can secure the cardboard strips along the perimeter of one cardboard piece using painter’s tape, ensuring there’s a tiny gap left open for filling with treats (alternatively, seal it completely if you want it solely as decorative art).
After securing the sides together, apply adhesive to finish the piñata by attaching the secondary shape on top.
Related:
All You Need for Crafting the Ideal Homemade Picnic Experience
Step 3: Fringe This Way!
You have successfully arrived to the final step where your piñata gets its fabulous, colorful look! Now, take your crepe paper and cut it into strips about 2-3 inches wide. Then, fringe one edge of each strip by making small cuts all along one side (this will take many, many strips of crepe paper in different colours to fill our DIY mini piñatas).
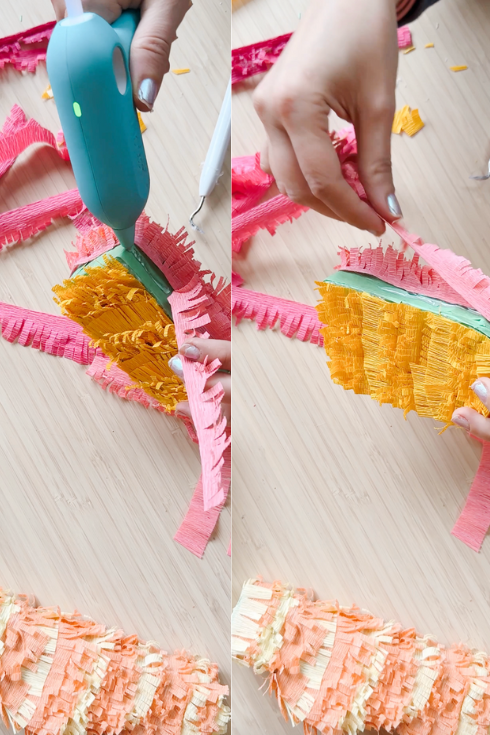
Starting at the bottom of your piñata, use the hot glue gun to attach the fringed crepe paper strips in layers. Overlap each layer slightly as you work all the way to the top. The most fun part? Mix and match different colours or create bold patterns to really bring both your piñata and personality to life.
Bravo
! You’ve just created a delightful mini piñata that’s both adorable and plastic free. They are perfect for party decorations, fun game props or as part of a thoughtful present for your friends.
Happy crafting, and remember, every mini piñata you make is as unique and special as the thought you put into it. If you would love to see more craft ideas just like this one, head to our DIY section
right here
.
The post
Easy DIY Mini Piñatas: A Step-by-Step Tutorial
appeared first on
Home Network
.


